Showing posts with label tutorial. Show all posts

Monday, March 28, 2016

Drawstring Tote Bag Instructions


This drawstring tote bag is now my go-to gift bag. No need for a bunch of wasteful tissue paper to hide your present -- the drawstring closure keeps your surprise under wraps :)

The bag also becomes an extra bonus on top of the gift it's carrying inside. The first friend I gave one to years ago has been using it as her lunch bag. My sister-in-law intends to use hers to carry her art supplies.  It's just a conveniently sized little bag to carry stuff around in, with a simple closure so your things don't fall out.  What else could you ask for? :)

Although I first made this a few years ago and have made a few more since -- there are a couple of spots where I tend to mess up the construction (and then end up having to unpick a lot of stitches as a result).  So I figured it was time to put together instructions to prevent such future kerfuffles.

Here's what you need:


1 piece for the body - 21" x 14"
2 pieces for the handles - 3" x 14"
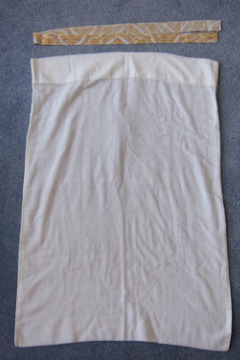
1 piece for the casing / drawstring closure - 8" x 21"
1 drawstring - at least 23" long (not in picture)

1. First we make the handles and body like you would with any other tote bag.


First, fold the handle pieces the long way, right sides facing and stitch the long sides together with a 1/4" seam allowance (so you have a long skinny tube).  Press the seam open and turn it right side out (attach a large safety pin onto the end of the tube and then push that safety pin through the inside of the tube to turn the tube right side out).


Press the handles with the seam in the middle.  Stitch along the length of the handles with 1/8" seam allowance (or as close to the edge as you can stitch nicely).


For the body piece, zigzag 3 out of the 4 edges, leaving one long edge raw.  This will be the top / opening of the bag.  Fold the piece in half, and stitch around the side and bottom of the bag with a 3/8" seam allowance, leaving the raw edge on top open.


(Optional) Square off the bottom corners of the bag, snip off the corners and zigzag the raw edge.

2.  Now we make the casing / closure for the drawstring tote bag.


Fold the casing/closure piece in half the long way and press.


Open it and fold it in half the other way and pin together.  Using pins, mark a point 1/2" from each side of the fold you made in the previous step (this is assuming that your drawstring is less than 1/2" wide -- if it's wider, you would mark those points the width of your drawstring away from the centre fold you made earlier).  Stitch this left side of the casing, from the bottom towards the middle, stopping at the mark you made and then back stitching.  Repeat from the top to wards the middle.

You now have a tube with the same diameter as the bag opening.


Press the seam open and stitch around the opening you have in the middle.  This is the opening for the drawstring casing.


Fold the tube in half along the crease you made at the beginning.  Stitch around the tube 5/8" from the fold.

3.  Now that we have the bag, handles and casing / closure piece, it's time to put them all together.


With the bag body right side out, pin the handles to the top of the bag 2 1/4" from the sides, with the seam facing away from the bag.  Put the casing over top of the body and handles and pin the raw edge of the casing to the opening of the bag.  Stitch with 3/8" seam allowance.


Turn the bag inside out and press the seam open so that the casing piece is flat.  Fold the whole top of the bag down so that 1 1/4" of the right side of the body fabric is showing.  Fold the handles up and pin.  Stitch around the opening of the bag, 1/8" from the top as well as 1/8" from the seam between the bag body and drawstring closure.

Turn the bag right side out, insert your drawstring and you're done!


Friday, January 4, 2013

Handkerchief tote bag

Here's a very simple project that I did with my Girl Guides (ages 9-11) last year.  They did it as part of their needlework/sewing badge.  The girls were able to get it done on the same meeting that they learned to use the sewing machine (with some help, of course).  If you were doing it on your own, you could probably finish the whole thing in well under 10 minutes.

It makes a cute little gift bag.

Here's how you do it:

Start with 2 handkerchiefs, the same size.  Pin them together, right sides facing (not shown).  Draw a line 2-3 inches from the edge.  Cut along this line to create the strip for the handle (the exact placement of this line is not critical -- just eyeball it).

Wednesday, January 4, 2012

Origami frog!

Please excuse yet another non-sewing related post.  This is just something else I had to share.

This origami frog has provided countless hours of entertainment for children (and non-children) I've known.  It's great for warding off boredom when all you have is paper and limited space.  It's less disruptive than paper airplanes and considerably more fun than a paper crane.


Wednesday, November 30, 2011

Adding a drawstring closure to a yoga bag

Last week, I figured out another (hopefully simpler) way to make the drawstring closure on a yoga bag.  Here's the bag I made today using this new (and hopefully improved) method.


Wednesday, September 21, 2011

Adding snaps to a tote bag - so it stays folded

We can also use snaps to keep a bag neatly folded while it's not in use.

The first thing to do is fold the bag so we can figure out where to put the snaps.  I'm sure there's more than one way to do this but for this particular bag, I folded the straps on one side of the bag, folded the bag into thirds, folded the top and bottom so they meet in the centre and then folded the whole thing in half.


Adding snaps to a tote bag - so it closes

I like to keep my card making supplies in this tote bag.  This way, I have everything together and ready to go when I need a quick and easy activity for Girl Guides or day camp.  As a storage solution, though, it's not ideal.  Sometimes the bag will fall over in my closet and the contents will spill out and, overall, it just looks a little untidy, especially with the straps hanging out.


Thursday, September 15, 2011

Adding belt loops to pants

I really like these pants (thanks Aysha!). Having just recently bought the belt I need to keep them up, I noticed that these pants are sorely lacking in belt loops (aside from that one in the centre back, there are only two more in the front). So, I decided to do a little transplant...


Monday, August 29, 2011

Eid Card

This has nothing to do with sewing but with Eid coming up, I just had to share this pop-up Eid card.


Monday, August 8, 2011

Monday, August 1, 2011

Cooling pad

It's actually the same thing as the heating pad, but with the heat we've been experiencing lately, a cooling pad seemed like a more appropriate project.


Friday, July 29, 2011

Heating pad from shirt collar

Here's another super simple project: making a heating pad/neck warmer from a recycled shirt collar.

All you need is the collar from a shirt... (here's what Aysha did with other parts of this shirt)

...and some flax seed.

Sunday, July 24, 2011

Laundry bag from recycled pillow case

Here's another simple project: a travel-sized laundry bag made from an old pillowcase and a long strip of fabric for the drawstring. 


Tuesday, July 19, 2011

Putting more pockets in the shopping bag

It turns out that one little pocket just isn't enough for my keys, wallet and cell phone.  So today added a couple more.  I found another shirt pocket from the stash of scraps that Aysha gave me that was just perfect.

Monday, June 13, 2011

Putting a pocket in a shopping bag

The other day, I needed to run to the store to get something, and, as usual, I didn't have any pockets (why don't they put more pockets in women's clothes?). If it was winter, I would've put on my coat and used its pockets but now that it's nice and warm (finally :D), I wasn't going to do that. So, rather than bring my shoulder bag (along with all the random stuff that's always in there), just to hold my wallet and keys, I decided to throw them into the shopping bag.  It just made me think, this thing really needs a pocket.

Well, yesterday, I was going through the stash of scraps that Aysha gave me last year, and guess what I found? A pocket! She had unpicked it off a shirt. If I'm not mistaken, it was this shirt.

So, I turned my shopping bag inside out, pinned the pocket on, ...


...stitched it and I was good to go!

Sunday, June 12, 2011

Simple recycled pillowcase tote bag

Yesterday, I decided that I need some smaller bags bags to store my fabrics in.  I had made a giant bag a few months ago by stitching two pillowcases together but once that bag was filled with fabric, it became really awkward and heavy to carry.  So, I made a bag out of one pillowcase.  I just used the hem of the original pillowcase to make straps and then attached these straps to the remaining pillowcase.

Here's how to do it:

Monday, May 30, 2011

Making a yoga bag - summary and quick reference

This is the 7th and final post in the yoga bag tutorial.  Yay!  One week and 200+ photographs later (not all of which were posted on the blog), we've got this:


Here are a couple more views:


Here's a quick overview of how we made it.

Sunday, May 29, 2011

Making a yoga bag - attaching the strap and the round bottom

Today, in part 6 of 7, we're attaching the strap onto the bag and putting on the round bottom. We're going to attach the round bottom so that the raw edges are hidden and we get clean finishes from the inside and outside.

Attaching the bottom of the strap
  • Pin the strap to the outside of the bottom of the bag so that it's centred over the flat felled seam
  • Stitch with 1/4" seam allowance

Saturday, May 28, 2011

Making a yoga bag - drawstring closure

Today, in part 5 of 7, we're making the drawstring closure and attaching to the top of the bag.

Setting up the flat felled seam
  • Pin right sides facing, with edges 3/8" apart
  • Stitch with 5/8" seam allowance
  • Press closed with the wide edge on top of the narrower edge

Friday, May 27, 2011

Making a yoga bag - the tube and flat felled seam

Today, in part 4 of 7, we're rolling the body of the yoga bag into tube and stitching it together with a flat felled seam. You don't have to use a flat felled seam. I did my first couple of bags with a French seam. You can also sew a regular seam or finish the edges with a serger. Although I really like the flat felled seam, making it on this long tube is a bit awkward (as you'll see below).

Thursday, May 26, 2011

Making a yoga bag - the pocket

Today, in part 3 of 7, we're putting trim on the pocket and attaching the pocket to the body of the bag.

Putting trim on the pocket (optional)
  • Fold the trim fabric, right side out, along its length so it looks like two double fold hems touching each other (hopefully it's clear on the picture)
  • Pin the folds in place and press

LinkWithin

Related Posts Plugin for WordPress, Blogger...