Today, in part 5 of 7, we're making the drawstring closure and attaching to the top of the bag.
Setting up the flat felled seam


Completing the flat felled seam with an opening for the drawstring


![]()


Stitching the drawstring casing


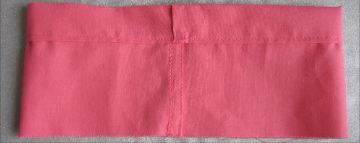
This is what the drawstring closure looks like, inside out.

Attaching the drawstring closure to the bag


Setting up the flat felled seam
- Pin right sides facing, with edges 3/8" apart
- Stitch with 5/8" seam allowance
- Press closed with the wide edge on top of the narrower edge


Completing the flat felled seam with an opening for the drawstring
- Make two 3/8" slits in the wide edge, 1/2" and 2" from the top - the opening for the drawstring will be between these slits
- Above the top slit and below the bottom one, fold the wide edge and tuck it in under the narrow edge, pin and press
- Stitch 1/8" from the folded edge, reverse stitching at the slit
- Coming from the other side, stitch 1/8" from the folded edge and reverse stitch at the slit
- Turn the drawstring closure right side out and stitch 1/8" from the folded edge again, reverse stitching at the slits
- Turn inside out and unpick the stitching between the slits


Stitching the drawstring casing
- With the drawstring closure inside out, fold the top edge (closest to the slits) down 1/4", wrong sides facing and press
- Fold down closure again, 1" and press
- Stitch the casing closed, 1/8" from the edge of the fold


This is what the drawstring closure looks like, inside out.
Attaching the drawstring closure to the bag
- With the bag inside out, fold the top down 1.25", wrong sides facing, and press
- Open the fold. With both the drawstring closure and the bag turned inside out, pin the bottom of the casing on onto the top of the bag so that the bottom edge of the drawstring closure is 1" away from the crease on the bag and there is 1/4" of overlap between the two pieces (you can pin the pieces together so that the flat felled seams are aligned or on opposite sides or in any other desired configuration)
- Machine baste 1/8" from the edge (this stitching may be visible once the bag is done, but it can be removed if desired)
- Fold the top of the bag down along the crease that was made earlier
- Fold the drawstring closure back up so that the raw edge of the bag meets the fold in the drawstring closure and press
- Stitch 1/8" from the fold


Here's what it looks like when you turn the bag right side out. In the close up view of the top of the bag (right), you can see the row of machine basting just above where the closure meets the bag. If you don't like that look of it, you can unpick that. I think I'm going to leave it.


Note:
If you find the raw edge of the fabric peeking out from the opening of the drawstring casing, just fold it back in and press it with your fingers.

 To prevent this from happening, I would make the drawstring closure a bit differently next time. Just after unpicking the opening for the drawstring casing, I would fold back the flap between the two slits and press it (before folding and stitching the drawstring casing).


Note:
If you find the raw edge of the fabric peeking out from the opening of the drawstring casing, just fold it back in and press it with your fingers.


No comments:
Post a Comment